
Craving a sweet treat that’s both easy and delicious? Look no further than this No-Bake Chocolate Eclair Cake! With layers of creamy pudding, airy whipped topping, and rich chocolate, it’s perfect for any occasion. You don’t need an oven to impress your friends and family. In this guide, I’ll share simple steps, tips, and tricks to create this dessert delight. Let’s dive into the sweet world of no-bake creations!
Ingredients
To create a No-Bake Chocolate Eclair Cake, you need simple ingredients. Here’s what you’ll need:
– 1 box (14 oz) Graham crackers
– 2 packages (3.4 oz each) instant vanilla pudding mix
– 4 cups cold milk
– 1 container (8 oz) whipped topping (like Cool Whip)
– 1 cup powdered sugar
– ½ cup unsweetened cocoa powder
– ½ cup unsalted butter, softened
– 1 tablespoon vanilla extract
– A pinch of salt
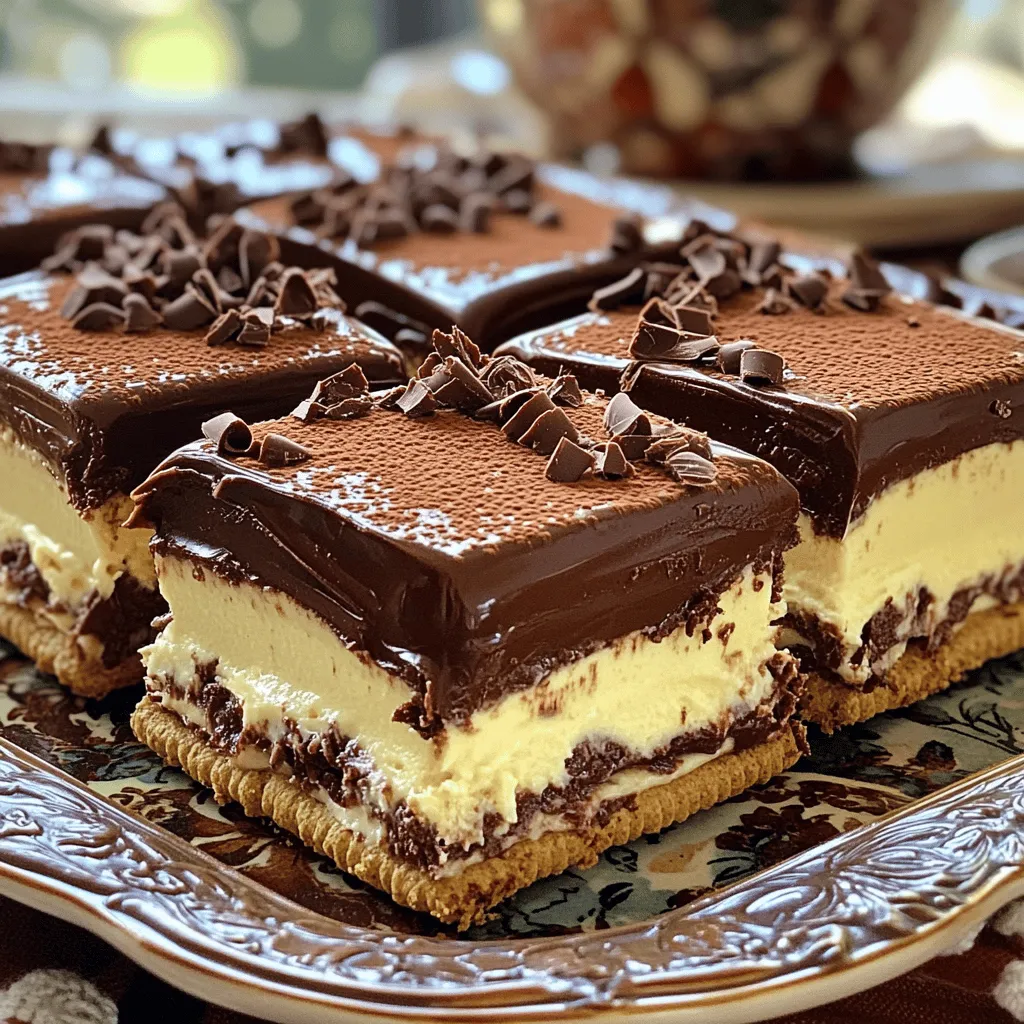
These ingredients work together to create a creamy, rich dessert. The Graham crackers form a crunchy base, while the pudding mix adds a lovely vanilla flavor. The whipped topping gives it a light, fluffy texture. The cocoa powder and butter come together to make a chocolate layer that is so delicious.
Make sure your butter is softened for easy mixing. This cake can impress your friends and family without the need for baking.
Step-by-Step Instructions
Preparation Process
– Whisking the Pudding Mix and Cold Milk
Start by taking a large mixing bowl. Add two packages of instant vanilla pudding mix and four cups of cold milk. Whisk them together until they blend well. Let the mixture sit for 2-3 minutes. This allows it to thicken, which is key to a creamy texture.
– Folding in the Whipped Topping
Next, take an 8 oz container of whipped topping. Gently fold it into the pudding mixture. Use a spatula to ensure it’s smooth and creamy. This step makes the cake light and fluffy.
– Making the Chocolate Frosting
In another bowl, beat together half a cup of softened unsalted butter, one cup of powdered sugar, and half a cup of unsweetened cocoa powder. Add one tablespoon of vanilla extract and a pinch of salt. Mix until fluffy. This frosting gives a rich chocolate flavor.
– Layering the Graham Crackers and Pudding
Now, line the bottom of a 9×13 inch pan with a layer of Graham crackers. Spread half of the vanilla pudding mixture evenly over the crackers. Use a spatula to smooth it out. Add another layer of Graham crackers on top. Repeat this with the remaining pudding mix and finish with a final layer of crackers.
– Final Assembly and Refrigeration
Spread the chocolate frosting over the top layer of Graham crackers. Make sure it covers the surface well. Cover the cake with plastic wrap and place it in the fridge. Let it chill for at least 4-6 hours, or overnight if you can. This waiting time helps the layers soften and blend together perfectly.Enjoy creating this delightful dessert!
Tips & Tricks
Perfecting the Texture
Allowing the Cake to Chill
Chilling is key for this cake. It helps the layers soften and blend. I recommend letting it sit for at least 4 to 6 hours. Overnight is best! The longer it chills, the better the taste and texture.
Using Fresh Ingredients
Always use fresh ingredients. Fresh milk and whipped topping make a big difference. They enhance the flavor and texture, making each bite light and fluffy. Trust me, it’s worth it!
Serving Suggestions
When serving, cut the cake into squares. Use a sharp knife for clean edges. You can top each piece with whipped cream or chocolate shavings for a nice touch. A decorative platter also makes it look fancy!
Common Mistakes to Avoid
Not Allowing Enough Time to Set
One common mistake is not allowing enough time for the cake to set. If you cut it too soon, the layers may not hold. This can ruin the overall look and taste. Always be patient!
Overmixing Ingredients
Overmixing can lead to a dense texture. When you mix the pudding and whipped topping, do it gently. You want to keep it light and airy. This ensures a creamy and smooth filling that’s just perfect!
Variations
Flavor Enhancements
Adding different flavors can make your No-Bake Chocolate Eclair Cake even better.
– Adding Fruit Layers: You can layer in some fresh fruit. Strawberries or bananas work well. These fruits add sweetness and a nice texture. Place thin slices on top of the vanilla pudding before adding the next layer of Graham crackers.
– Using Different Pudding Flavors: Instant pudding comes in many flavors. Try chocolate, butterscotch, or even banana. Each flavor gives a unique twist to the cake. Mixing flavors can add depth and excitement to each bite.
– Incorporating Nuts or Other Mix-Ins: Chopped nuts like pecans or walnuts can add crunch. You can also mix in chocolate chips or toffee bits for extra sweetness. Just fold them into the pudding mix before layering.
Dietary Considerations
You can easily modify the cake for different diets.
– Gluten-Free Alternative: Use gluten-free Graham crackers instead of regular ones. This way, everyone can enjoy this tasty treat without worry. Check labels to ensure that all ingredients are gluten-free.
– Dairy-Free Options: You can swap the milk and whipped topping for dairy-free versions. Use almond milk or coconut milk for the pudding. There are also great dairy-free whipped toppings available. Just make sure to choose dairy-free pudding mixes as well.
These changes can make the No-Bake Chocolate Eclair Cake fit your needs while keeping it delicious.
Storage Info
Best Practices for Storing
To keep your No-Bake Chocolate Eclair Cake fresh, refrigerate it right away. Place the cake in an airtight container or cover it tightly with plastic wrap. This helps avoid any odors from the fridge.
How Long It Lasts
In the fridge, your cake can last up to 4-5 days. The flavors meld and improve as it sits. Just remember to check for any signs of spoilage before serving.
Freezing Instructions
How to Freeze Layers
If you want to freeze this cake, it’s best to freeze the layers separately. Wrap each layer of Graham crackers and pudding tightly in plastic wrap. Then, place them in a freezer-safe bag or container. This keeps the texture nice when you thaw.
Thawing Tips for Optimal Texture
To thaw, move the layers to the fridge the night before you want to eat them. This helps maintain the cake’s creamy texture. Avoid thawing at room temperature, as it can make the layers soggy. Enjoy as a sweet treat when you’re ready!
FAQs
How long does No-Bake Chocolate Eclair Cake last in the fridge?
No-Bake Chocolate Eclair Cake lasts about 3 to 5 days in the fridge. It keeps well, thanks to the layers of Graham crackers and pudding. The longer it sits, the softer it becomes, which many people love. To enjoy it at its best, eat it within the first couple of days.
Can I use homemade whipped cream instead of Cool Whip?
Yes, you can use homemade whipped cream! It adds a fresh taste. Just whip heavy cream until it forms soft peaks. Then, fold it into the pudding mixture gently. This will make your cake even more delightful. Homemade whipped cream also gives a nice texture and flavor.
What’s the best way to cut and serve this cake?
For the best cuts, use a sharp knife. Run it under hot water and wipe it dry. This helps cut through the soft layers easily. Serve each piece on a plate, and you can add some extra whipped cream or chocolate shavings on top for a fun touch. It looks great and tastes amazing!
Can I make this cake ahead of time?
Absolutely! Making this cake a day ahead works great. Just let it chill overnight. This gives the flavors time to blend and the layers to soften. The wait is worth it, as the cake becomes even more delicious.
This blog showed you how to make a No-Bake Chocolate Eclair Cake. We started with a simple list of ingredients and a clear step-by-step process. Tips helped you avoid common mistakes and enhance flavors. Remember to chill the cake for the best texture. You can also experiment with variations. Store leftovers properly for freshness. With these tools, you can enjoy a delicious dessert anytime. Get ready to impress your family and friends with your baking skills!


